Whether you have ample storage space in your kitchen or you are restricted in your space, these pantry organization tips will help you find the perfect harmony. The kitchen must be one of the most important parts to our home & when there isn’t a good flow it can be super frustrating. Like any good recipe you need just the right ingredients to make it a slice of perfection. Be patient with the process, you’ll get your pantry to fit your needs by the end of this blog post.
Below is the plan to resolve your pantry organization headaches, plus a few helpful tips that we have picked up along the way. Let’s get started!
Step 1: Supplies
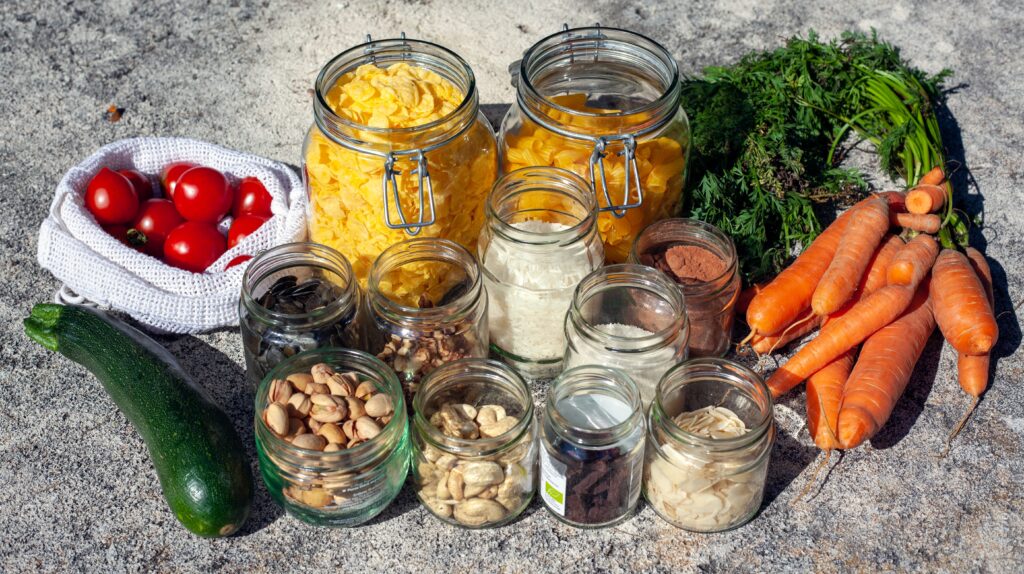
If you plan on decanting your pantry items (transferring to your own containers instead of the store bought), be sure to have them at your ready before starting this plan. When looking at the different types of storage containers we suggest for you to:
- Consider your preferred method of removing the contents that go into each, as you will want a wider mouth for items that you would like to scoop out.
- Look for the transparent containers as you will be able to see the contents of each container & know when you need to go shopping.
- Space can be an issue, try to find stackable storage containers where possible to maximize your pantry space. You can even through a lazy susan or two in there for the standing items instead of digging to get to the one in the back of the pantry – they work great in the corners as well.
Step 2: Clean Slate
There is no sense trying to make sense of the chaos that brought you here. Let’s take out everything & start fresh. If you’re feeling ambitious, you can follow step 3 to make it a smoother process later. As you pull out your pantry items, check for any expired items to throw out. Now that your pantry is empty, give it a good wipe down to start fresh with a truly clean space.
Step 3: Inventory & Categorizing
We have everything out, let’s see what exactly was in the pantry. Make note of what you have & what you use most, this can come in handy as a shopping list for later use. Next, organize your pantry items by categories; we like to use the “like with like” method, which is grouping similar items together i.e., cooking oils, spices, pastas. You can also go one step further by considering frequency of use within those categories to make products used often easily accessible.
Pro Tip: Some foods aren’t good neighbours, such as onion & garlic can be stored together, but they should not go near the potatoes as it speeds up the spoiling process. Another one to avoid is placing your flour & bread next to strong-smelling items (like cumin or curry powder), they easily absorb scents & flavours.
Step 4: Decanting (optional)
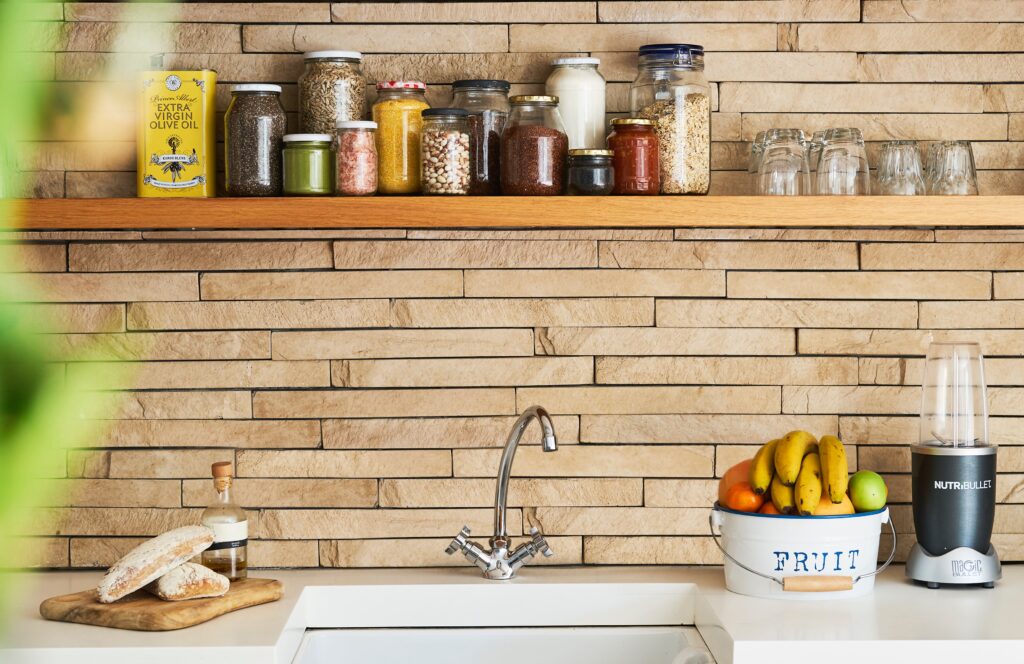
If you did not choose to go the route of buying storage containers, skip to step 5. If you did decide to decant your pantry items, let’s have some fun. You probably have a good idea of what items you want to place in which containers when purchasing, so go ahead and transfer them (if they have been cleaned already, of course). When transferring powder product, we suggest using a sifter to ensure nothing other than that product is going into the container.
Pro Tip: You may not need to label every container to know it’s contents if you bought the clear containers, you would be able to tell that the pasta is pasta. But we do recommend to at minimum mark the expiry date from the original packaging. If you’re wanting to go the bit further, you can mark the bought date on the container as well.
Step 5: Add Liners
Before you start placing your items back in the pantry it is a good idea to think about slip prevention. Shelf liners can help avoid future messes by eliminating the chance of slipping.
Step 6: Plan It Out
We know you’re probably gearing to get everything back into your pantry right about now, it’s soon we promise. Before you jump the gun & start putting everything away, take a few minutes to plan out what will be going where & if it will be functional. Some things we like to pass along is to:
- Think about your household & who will be looking for what. If you have children, are their snacks & drinks somewhere they can reach, or is there items you would prefer to keep out of their reach.
- Consider frequency of use. Make sure you put your staple items somewhere that won’t inconvenience you down the road.
- Remember your categories from step 3. We want to make sure that we give each of the categories enough space to fit easily.
- Don’t forget about the larger food items. They take up the most space, make sure that you leave the correct room for them.
- Utilize the unusual spaces. Look at your pantry doors or extra kitchen wall space, these can be great places to add hooks or additional organizers for additional items.
Step 7: Put the Plan into Action
You can start putting your planned pantry together! All that hard work is now going to come to life. Don’t feel discouraged if some of your ideas did not quite work out the way you thought it might. This is also the time to wake a step back & adjust. Whether it is a practicality issue or it does not look as visually appealing as you thought, it’s part of the process.
That’s it, you’re all done! Take a moment to admire it, that’s our favourite part. Before we conclude this blog post, we want to leave you with a few more bits of advice:
You’ll never be done organizing your pantry. It’s sad but true. The key we have found that works best so that we are not overwhelmed is; to get everyone in the house to put items back where they got them from and plan for a couple quick cleans a month, so you are not spending hours reorganizing again. You may even want to check-in a few times throughout the year to assess you contents & do a bit of a deeper clean of the shelves. Know that your pantry, like everything else in life, should evolve with you as your household & needs change. Try to stay flexible when it comes to reworking the systems that you have put into place until it works again.
We hope this helps! Let us know how your pantry organization turns out!